By Meng Tay
There are many reasons why you want to write a blog. Sure, you can share stories and pictures of your travels, family, friends, and what you are doing on Facebook, Instagram and a myriad of other social media websites. A blog, however, allows you to write a longer story, enhanced it with photographs and videos, design how it looks, and even make money for you if you do it right.
One of the easiest ways to create your own blog is using Blogger.com. There are other blogging websites, of course, but Blogger.com is free and easy to create your own blog. Here are the steps:
- Create a Google account (because it is owned by Google). This means creating a Gmail account. If you are already using Gmail, then you are all set. Even if you don’t plan to use Gmail, you need to create this account.
- Go to the blogger.com website. Click on “Create Your Blog” orange box in the middle.
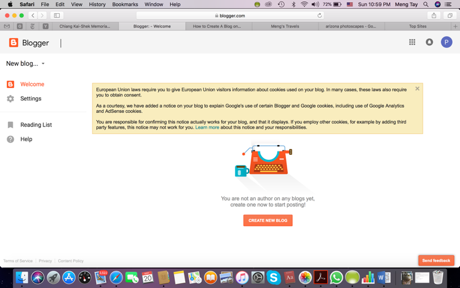
- The next screen you’ll see is asking you to “Create a Blog”. Here you need to pick a Title, which can be changed; a Blog address, which cannot be changed; and a Theme that can be changed anytime. You can have your blog Title and blog Address to be the same. Pick a title that expresses what your blog is all about. For example, if it’s about travel, you can call it “TravelWithJoe”.
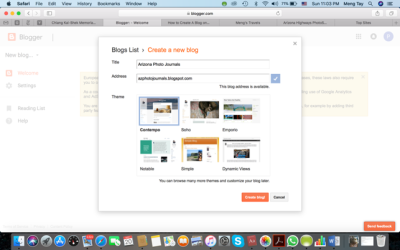
Finish this step by clicking on “Create blog!” at the bottom of the screen.
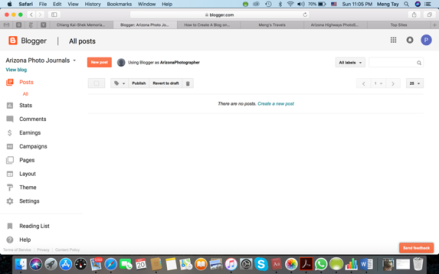
4. You will see the screen below. This is like your Home screen when you are logged into blogger. The next step is to start writing a New Post. A Post is an entry in a blog. Click on “New Post” at the top of the screen.
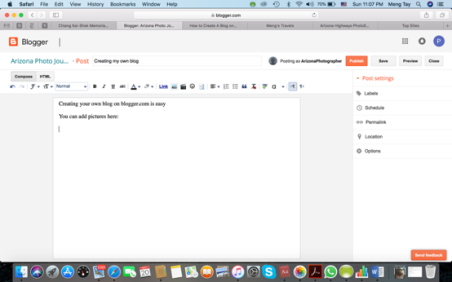
Now you will see a screen like this below. First, you need to give your Post a title that reflects what this post is all about. Something like, “How to pack for a safari”. Next, you need to pick the type of font you want for the body of your post. In the middle of the top menu bar are three important functions:
- Link: this allows you to add a link to an external article or website to your post. For example, instead of writing a long explanation about a city, you can add a link to Wikipedia about the city. It saves you a lot of time having to repeat what’s already out there on the internet.
- Photos: a blog without photographs is like eating bagels without cream cheese. By clicking on the photos icon, you bring up a screen giving you the choice of where you want your photos to be uploaded from. It basically brings up the Finder (on a Mac) or Folder (on your Windows PC).
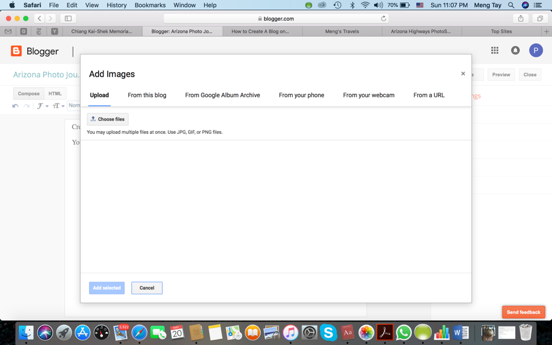
 The following screen says “Add Images”. Click on Choose Files and it will bring up the next screen.
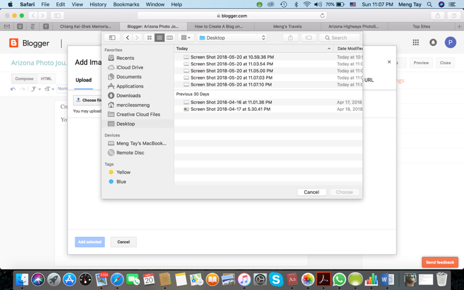
 This screen asks you to select the images to be loaded. It can be a file or a picture from the Photos album. I like to put my processed pictures in my Photos album (on Mac) so that it’s easy to see and upload to a blog, Facebook, or any other media. You can select multiples pictures or files at a time to upload. To select multiple pictures/files at a time, use the Select and Command key together.
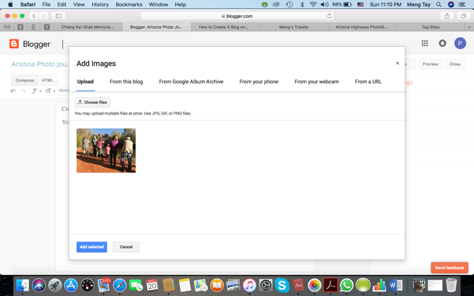
 This is what it looks like when a picture is uploaded. To add it to the blog, click on the picture to highlight it, then click on the “Add selected” button at the bottom.
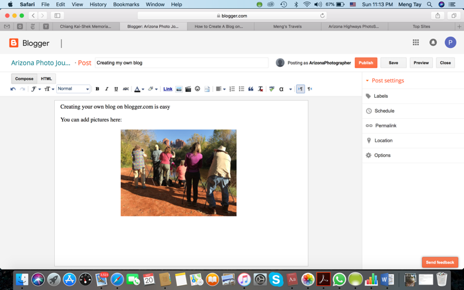
 The following screen shows what the post looks like when a picture is added. You can change the size of the picture and also add a caption by selecting it
- Videos – the process to add videos is similar to adding photos. There is a limit to how big the video file can be. I don’t know exactly what the limit is but I guess anything less than a 1-minute video is fine.
All you need now is to add a story to your blog. Remember to save the post every few minutes to make sure you don’t lose anything you’ve added. One of the disadvantages of Blogger is you have to be online to use it. If you don’t save it and you lose your internet connection, you may lose everything that you have added.
When you have finished, you should Preview your post before Publishing it. This gives you a chance to see what your readers see and correct any mistakes or change your layout. When you are sure that’s what you want others to see, go back your post and Publish it. Voilà! You have just created the first Post in your Blog!
The above gives you the basic steps to create a simple blog. You can customize and design it in many different ways by using the Layout and Theme functions. You can also make money from your blog by signing up with AdSense. Click on the Earnings function to learn how to do that.
I have been using Blogger for almost 10 years. Here is what my blog looks like:
https://mengineurope.blogspot.com
What I like about Blogger is it has an excellent Help section. Google has a staff that answers your questions. There is also a big community of bloggers that can also help you. If you don’t get it right at first, don’t worry. “Rome was not built in a day”. Keep tinkling and playing with it until you are happy with your design.
Happy Blogging!
Meng Tay is a Volunteer Photo Guide with Arizona Highways PhotoScapes
View Post on Original Blog
https://blog.ahpw.org/2018/06/02/how-to-create-your-own-blog/
