By Megan P Galope
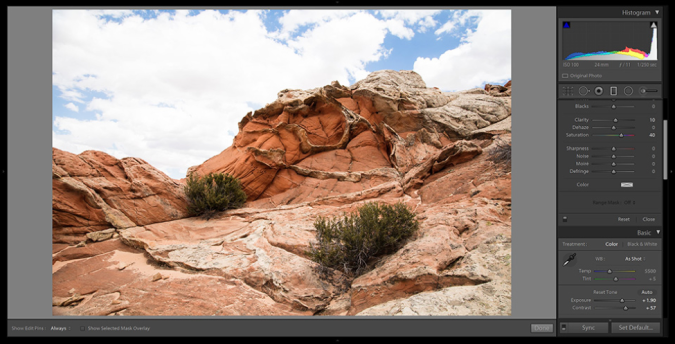
Have you ever tried using a graduated filter to make the sky darker, but in the process it also darkens the mountains? Trying to then remove the mountains from the filter was a tedious task. No more! Adobe Lightroom has recently added a new feature to the filters and adjustment brush called “Range Mask”, which makes these tools more precise and easy to use. Here is a typical image where the foreground is the correct exposure but the sky is too bright.
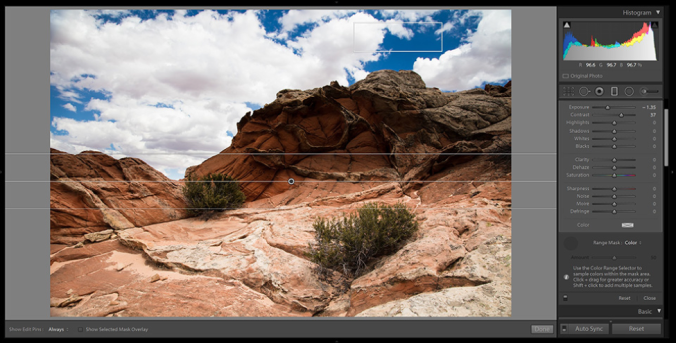 After adding a graduated filter, the sky looks good, but unfortunately, the foreground is darkened as well:
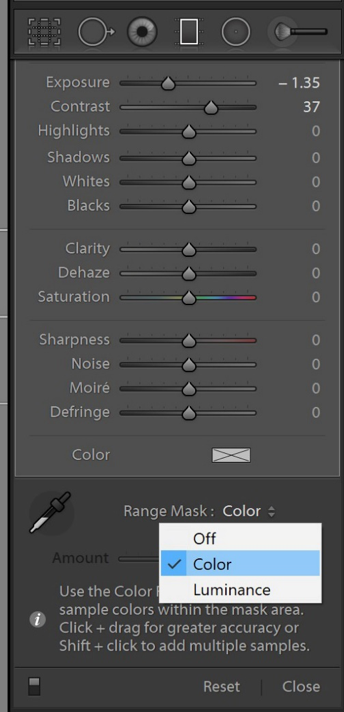
At the bottom of the graduated filter toolbox, you’ll now see an option for “Range Mask” (this assumes you have the latest version of Lightroom). Click where it says “Off”, and you’ll get a drop-down with a couple options. Choose the “Color” option.
 Next, click on the eye dropper tool to the left of the Range Mask option, and then click and drag in the sky to draw a box around the different colors in the sky (in this case, I drew a box that includes both the blue sky and the clouds). You want to choose the colors that you want to be affected by the graduated filter.
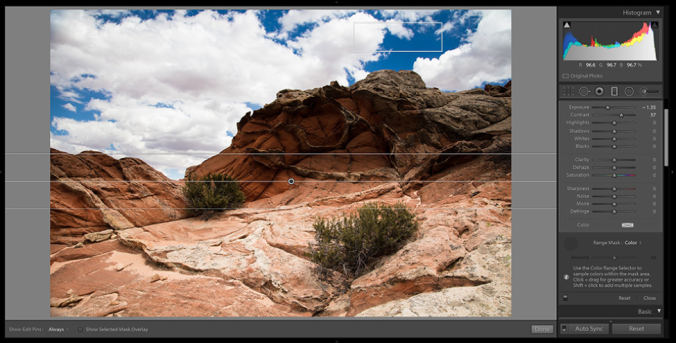
Notice the small square in the upper right
Once you draw the box and let go, voila! The sky is darker but the foreground hasn’t been affected by the filter:
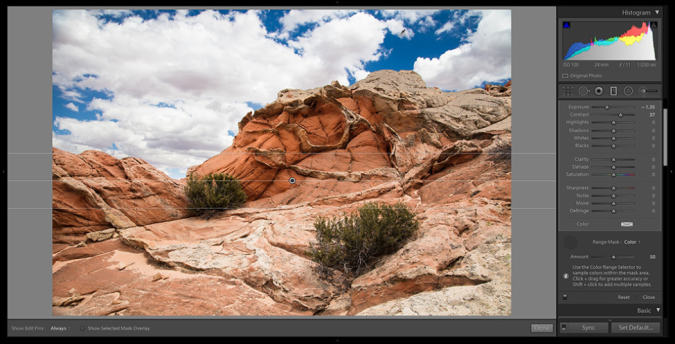
Truth be told, sometimes this works better than others. If it doesn’t work the first time, you can try drawing the Range Mask box again in a different spot, or make it larger or smaller. You can also draw multiple boxes to sample different colors by holding down the shift key while drawing another box. If you want to delete a box, hold down the Alt (Windows)/Opt (Mac) key (the mouse will turn into a scissors icon) and click on the Range Mask dropper marker that you would like to delete.
The Range Mask feature is available for both the graduated filter and radial filter as well as the adjustment brush.
Megan P Galope is a Volunteer Photo Guide with Arizona Highways PhotoScapes
Twitter = @megangalope mapphotography.smugmug.com
